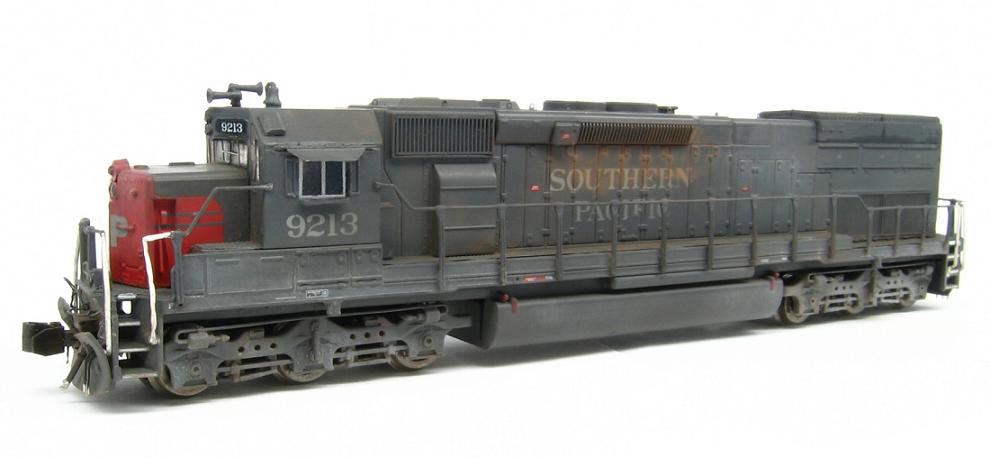
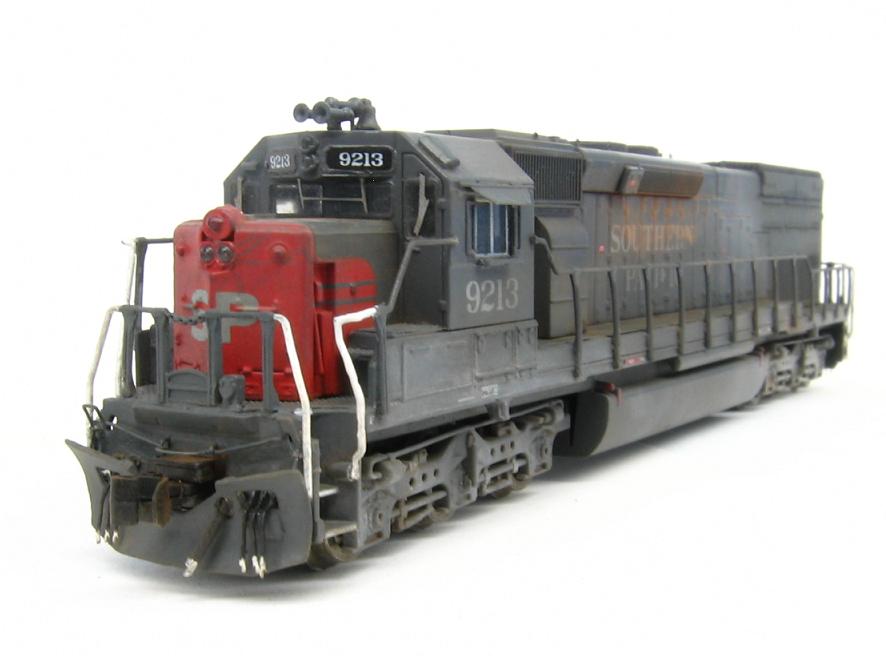
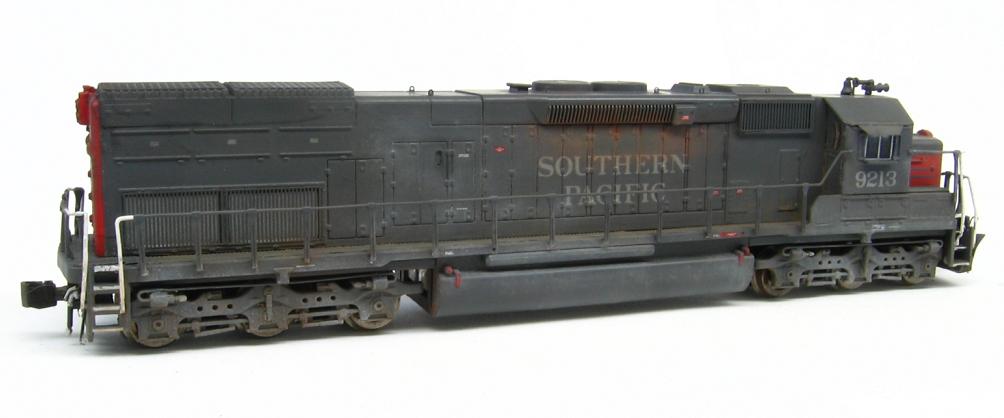
Here we have an Intermountain Railway Co. SD45T-2 loco painted for the Southern Pacific. Road number is 9213, which is correct for this model. There were numerous photos on the internet of these locos, and a few of 9213, although they were taken at a later date than what I model. This loco took me almost a month to detail, mostly because of how fragile the shell is. I also broke my last #80 drill bit on the rear, and had to wait a week for new ones. When I first started detailing this loco, I was just going to add a few things and leave it at that, but that wasn't the case. Instead I ended up bashing more parts and adding more details than any of my other locomotives. And this is just my first Tunnel Motor! I have about 30 more to go! So with this loco the precedence has been set for the rest. This will take quite a while!
As for the details, well here is the list. First thing I did was make some frame rails out of old Atlas code 80 rail. The rail was flipped upside down and glued to the shell in 4 places - front and rear of the fuel tank on both sides. Once these were in, I added airlines to the air cylinders on the trucks with wire. On to the shell, I took the front handrails off and spliced them in with a Kato handrail set so I could get the correct front end. The middle 2 stanchions, drop step and recepticle are from a Kato SD40 handrail set. The rest of the railings and stanchions on each side are the stock IM ones. On the pilots, I added cut levers, MU hoses, air hoses, and the front recieved a new plow.
One of the big letdowns with these locos is that IM didn't mold a tread into the walkways, they are just smooth. So this was the next thing to add. BLMA makes walkway tread, so this was cut, installed and painted. Since I put this in, the rear handrails did not line up anymore, so they were cut off and sanded shorter and re-glued into position. The rest of the fragile handrails were glued into position, since they had a tendency to fall off.
On to the cab, I added new sunshades, since the stock ones provided are grossly oversized. I also added some wind deflectors and arm rests on each side, made from sanding down some PC board. The windshield wipes are stock, and look pretty good. The stock horn was tossed, and I bashed 2 Kato 3 chime air horns together to get an SP style one. On one horn I cut off the small rear facing horn and replaced it with a long horn from the 2nd 3 chime. I also added 2 air vents, a small one above the front window on the engineers side, and a larger one on the sloped part of the cab roof on the firemans side. Both were made from scrap styrene. I then added lift rings to the long hood to complete the task.
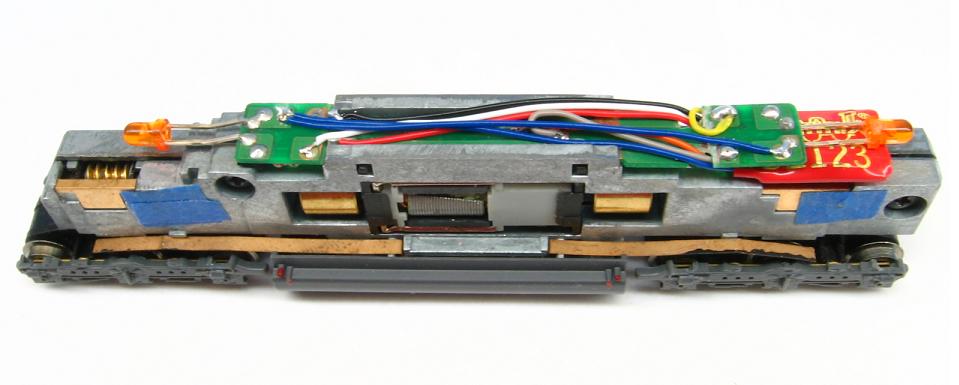
The insides got a Digitrax DZ123 added, and the outsides got a coat of weathering courtesy of some chalks. I left the insanely large couplers on untill I order more Z scale couplers.
This was my first SP loco to detail, and I'm happy with the way it turned out. She's now ready for service on the Owens Valley Sub!
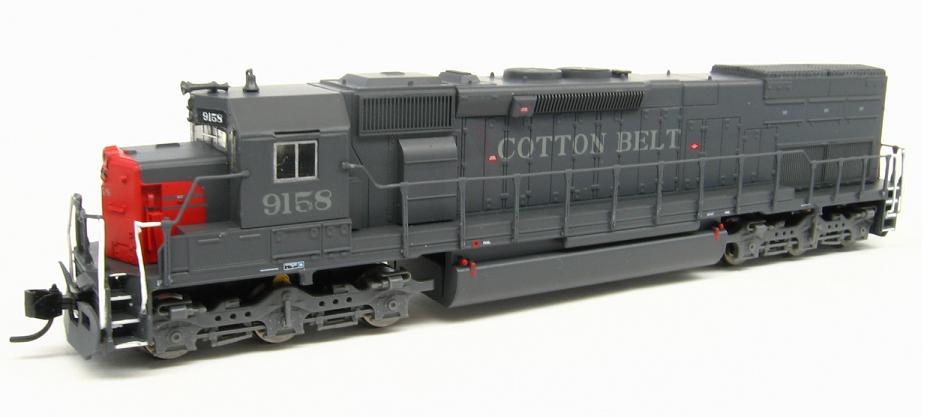
Stock (forgot to take a pic 9213, but Cotton Belt 9158 is identical)
And after
All material on The Owens Valley Subdivision website is Copyright 2007-20xx by Michael Stoner. None of the material (including text and photographs) on this web site may be reproduced in any form without prior written permission.